
Interactive Demonstration
Experience the entire SurePrep tax process from start to finish.
TaxCaddy comes equipped with integrated invoicing. Your firm can accept payments via Credit Card or ACH (direct deposit), or give clients the option to choose. All ACH-enabled financial institutions are supported and the following credit cards are accepted:
Visa, Mastercard, American Express, Discover, Diners Club, and JCB
In order to process invoice payments, your firm must have a Stripe account linked to your TaxCaddy instance. Learn more about Stripe on their official website (external link)→
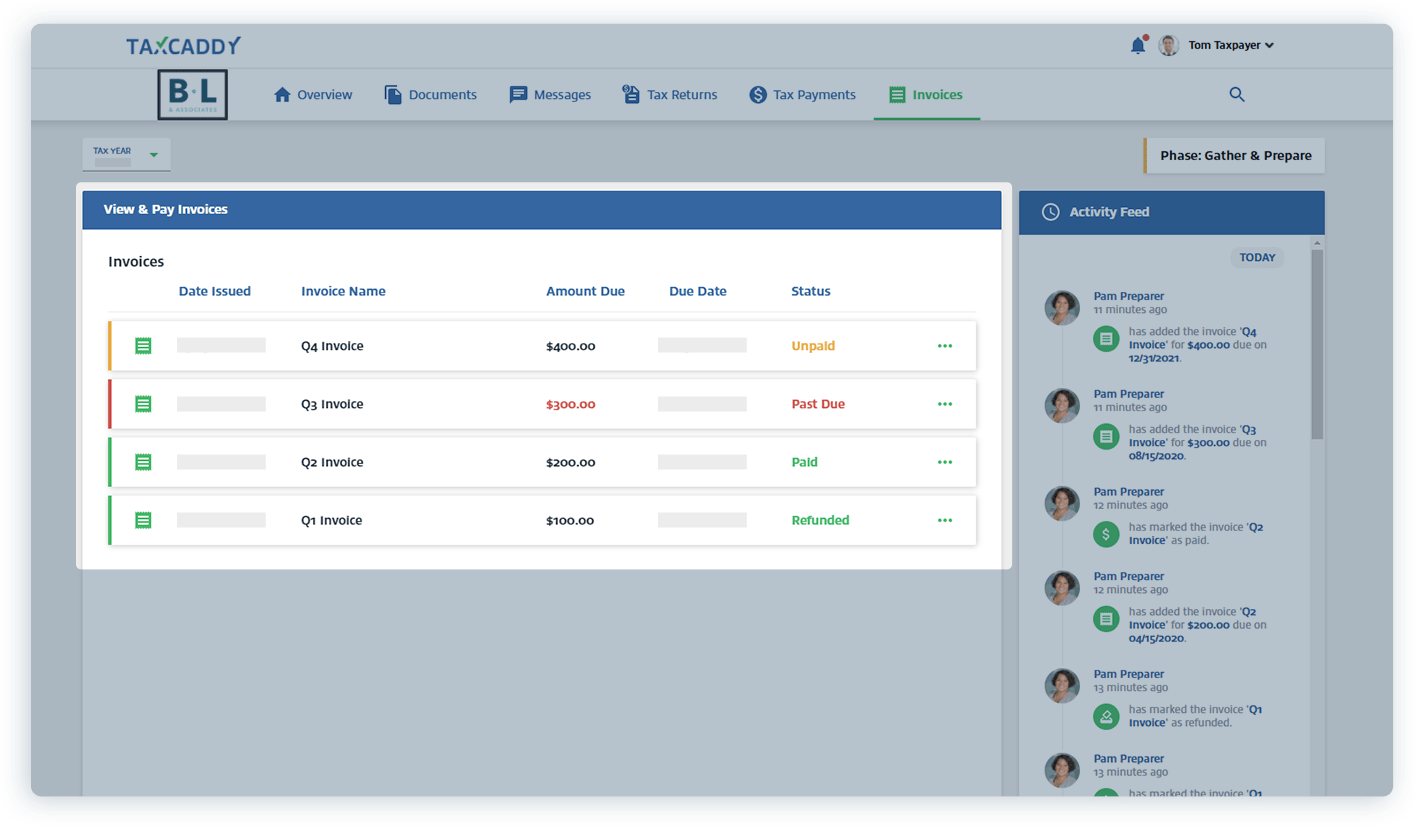
Managing invoices
Your firm can manage a taxpayer’s invoices under their Client Profile in the TaxCaddy dashboard. The Invoices tab displays the name of the invoice, when it was issued, which user uploaded it, the dollar amount, due date, and payment status.

To add a new invoice, simply drag-and-drop a PDF of the invoice into the Upload section and fill out the aforementioned fields. These fields can be edited later if circumstances change. The invoice payment status will update automatically for all transactions that occur inside TaxCaddy. If a payment (or refund) is rendered outside of TaxCaddy, you can update the invoice status manually.
Taxpayer experience
Once an invoice has been issued, it will instantly appear in the client’s TaxCaddy account, where it can be accessed via desktop browser, or the TaxCaddy apps for iOS and Android. If the client has mobile push notifications turned on, they’ll be alerted immediately.
TaxCaddy sorts invoices by tax year, so you and your client both have an organized record of invoices from current and prior years. In the TaxCaddy mobile app, invoices for each year are sorted by Invoices Due, Paid Invoices and Refunds. Paid invoices will display a ![]() icon while invoices that are past due will display a
icon while invoices that are past due will display a ![]() icon.
icon.
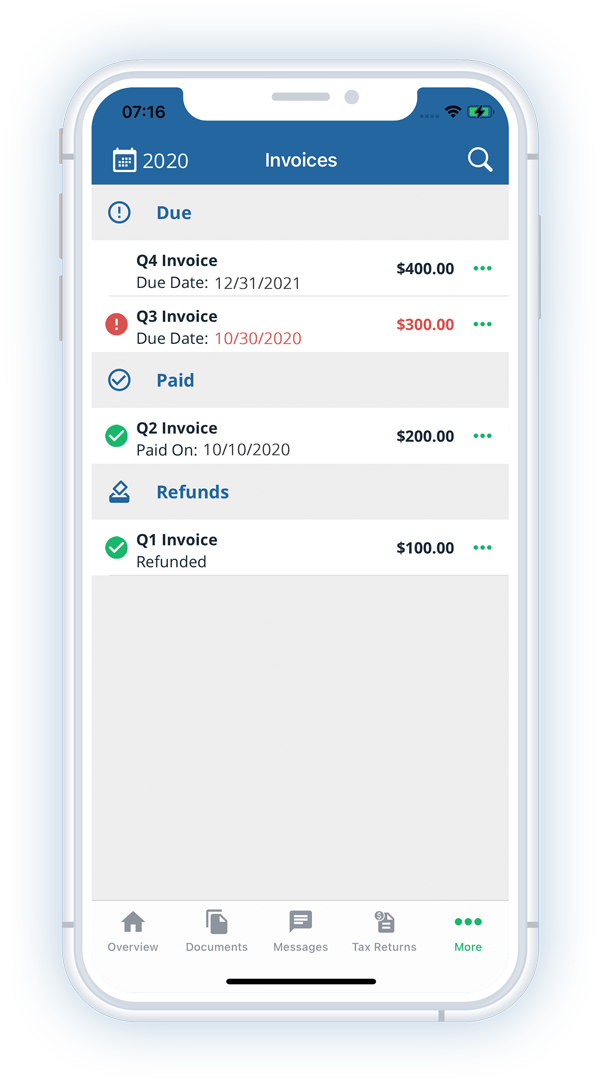
Taxpayers can view the invoice PDF or download it for their personal records. They can render payment without leaving TaxCaddy using the payment methods your firm has authorized. The payment screen will prompt them to add a credit card or bank account to their TaxCaddy account. Adding a bank account can be done through Instant Verification or Manual Verification.
Instant verification: The taxpayer signs in with the login credentials for their bank account.
Manual verification: The taxpayer inputs their account number and routing number. Manual Verification can take up to two business days to confirm.
Once the taxpayer selects their payment method and confirms the charge, the invoice PDF will be marked with an authorization stamp, TaxCaddy will instantly show the invoice as paid, and the charge will be transferred to your firm’s Stripe account.
Like invoicing, delivery can be managed from a taxpayer’s Client Profile. When your firm has finished processing a return, simply drag-and-drop the final PDF into the upload area of the Tax Returns tab. Your client will receive an alert that their return is ready and will have the option to view or download the final PDF. Because your clients own their own accounts, they’ll retain access to their prior year returns forever.
The e-file authorization is just as simple. To obtain an IRS-approved KBA e-signature on Form 8879, request a signature through the client’s DRL.
SafeSend Returns
TaxCaddy integrates fully with SafeSend Returns for firms who prefer to deliver the final return, invoice, and Form 8879 through this third-party service. Learn more about the integration→