
Interactive Demonstration
Experience the entire SurePrep tax process from start to finish.
The SPbinder workspace area consists of three main modules:
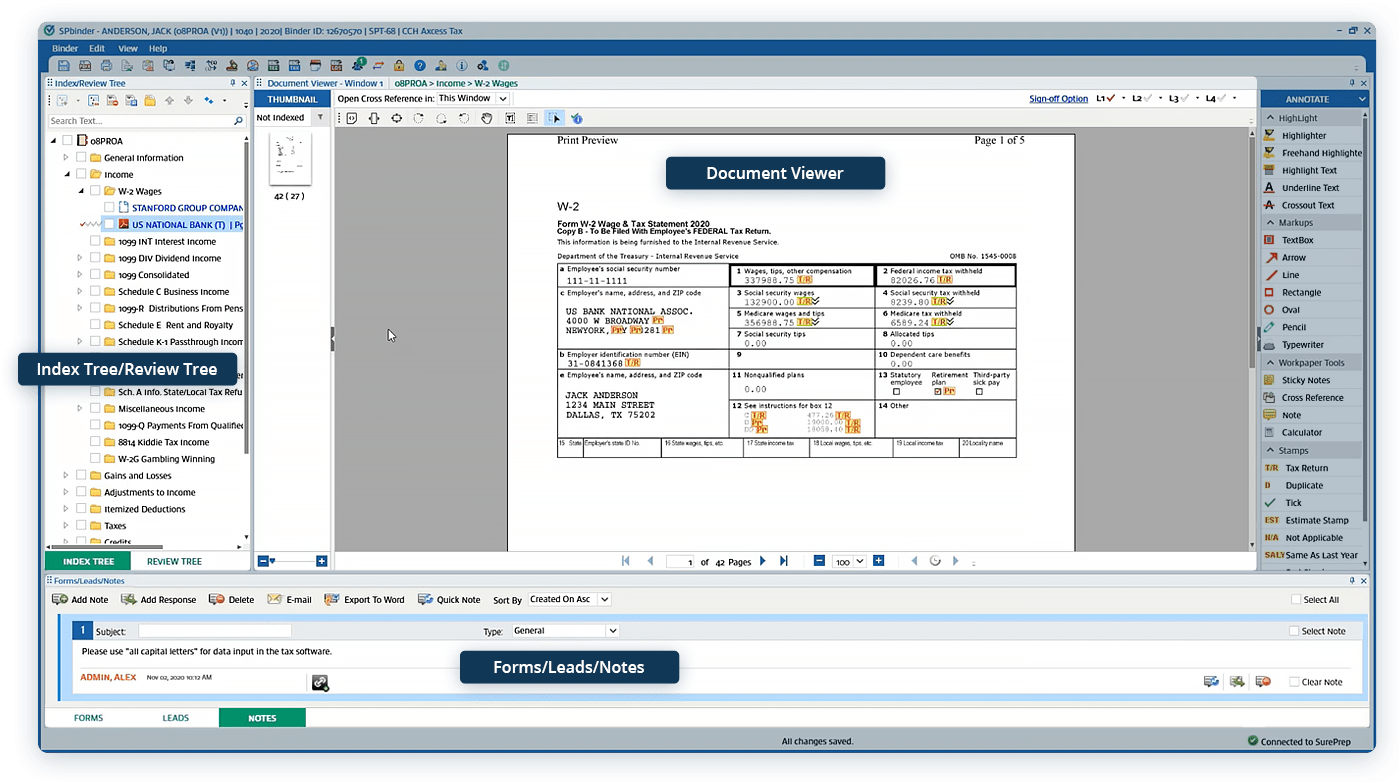
Users can hide, close, resize, or rearrange these modules at will. When rearranging, users can drag-and-dock modules to different areas of the screen or drag modules to a separate monitor. Workspace changes apply only to the individual user who made the changes and SPbinder will remember the modified layout the next time that user launches the software. Users can easily reset the workspace to default through the View menu.
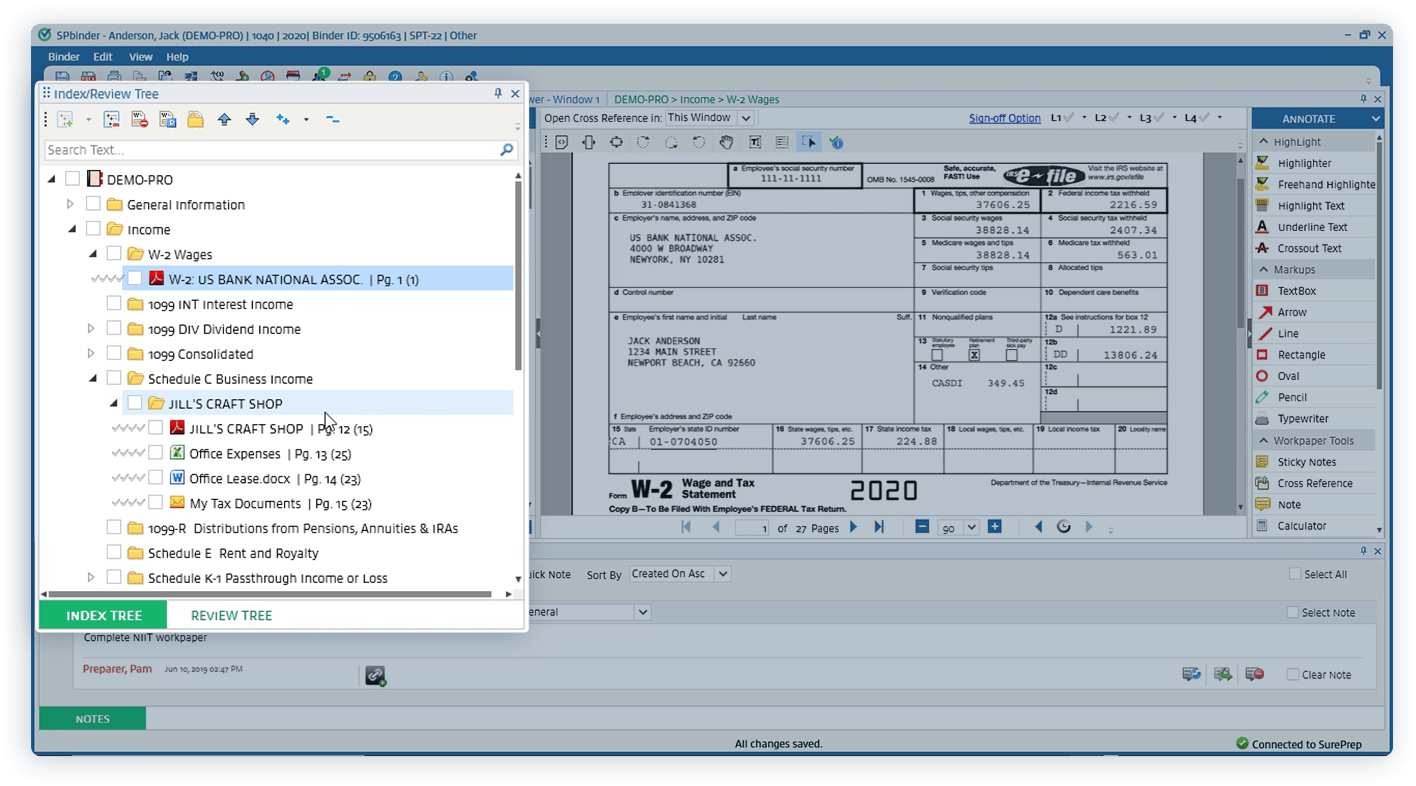
Tab 1: Index Tree
The Index Tree resembles a traditional folder tree and displays all workpapers in the binder and their parent categories, as well as proforma’d placeholders. The purpose of the Index Tree is to provide easy binder navigation. 1040SCAN automatically sorts your workpapers into the Index Tree in an order that follows the flow of the return. Read more about the Index Tree→
Tab 2: Review Tree
The Review Tree gathers all review items in one place, including workpapers, notes, form fields, and stamps. The purpose of the Review Tree is to centralize review items and to act as a review task checklist. Relevant items automatically populate the Review Tree as preparers work. Read more about the Review Tree→
By default, the Index/Review Tree module is positioned at the left-hand side of the workspace.
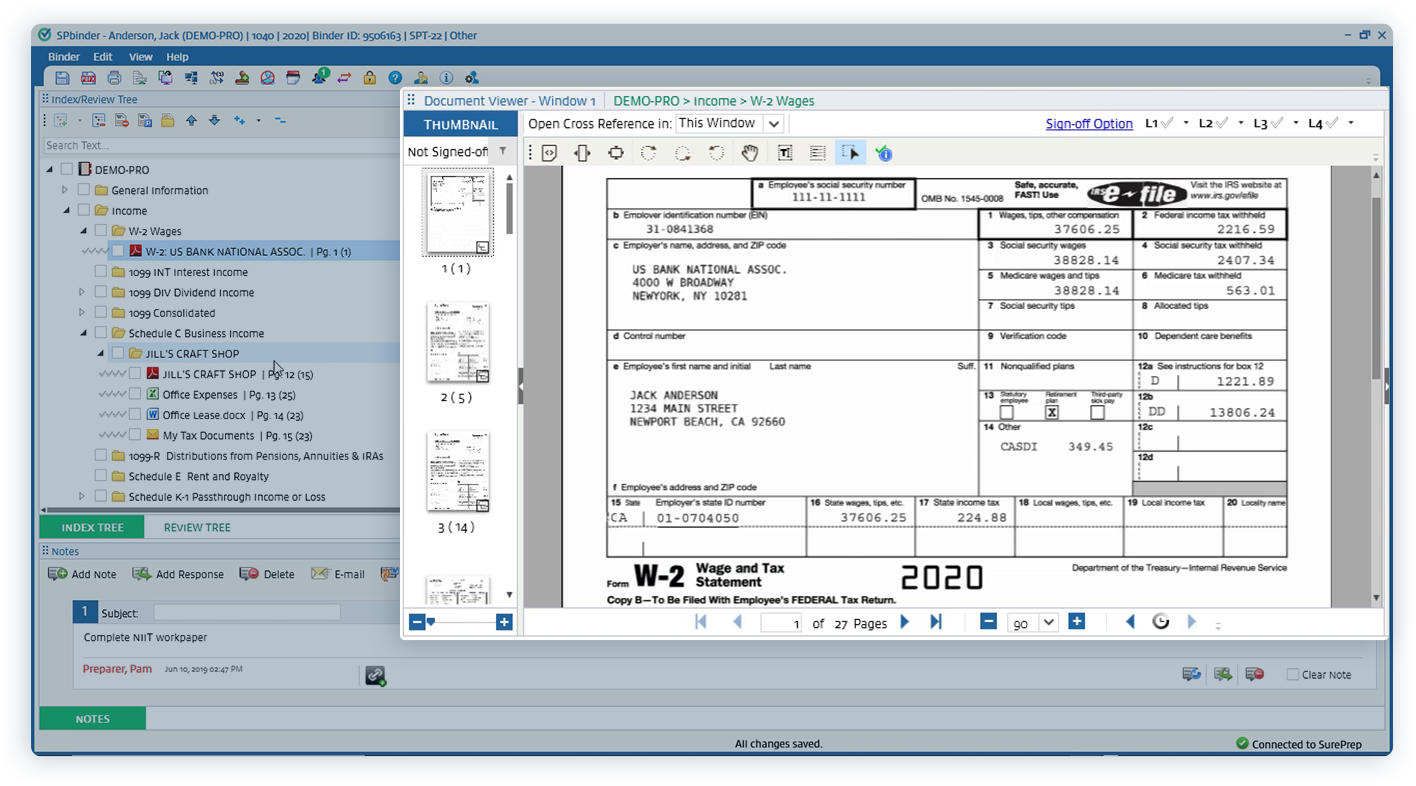
The Document Viewer displays your active workpaper(s).
The supported workpaper file types are PDF, Excel, Word, TIFF, and Outlook emails. Some Excel and Word functions are available directly in the Document Viewer for Excel/Word file types. Users can also launch documents in Excel/Word directly from SPbinder, make their changes in Excel/Word, then save and close to see their changes reflected in the Document Viewer.
Users can open up to four separate workpapers (or instances of the same workpaper) in different Document Viewer windows. Cross-Reference links open workpapers in the central Document Viewer by default, but users can easily toggle this setting so that workpapers launch in a new window.
The Thumbnail Panel is an expandable/collapsible section of the Document Viewer that displays thumbnail images of workpapers. By default, the Thumbnail Panel is open and displays workpapers that have not been indexed. This allows users to quickly index any outstanding workpapers by clicking and dragging those workpapers into the appropriate category (or profroma’d placeholder) in the Index Tree or by choosing to exclude those workpapers from the binder.
Users can apply filters to display different types of workpapers in the Thumbnail Panel. For example, users can view workpapers that have not yet been reviewed at their Sign-Off Level or workpapers that have been modified since their last sign-off.

By default, the Document Viewer is positioned in the center of the workspace.
Forms
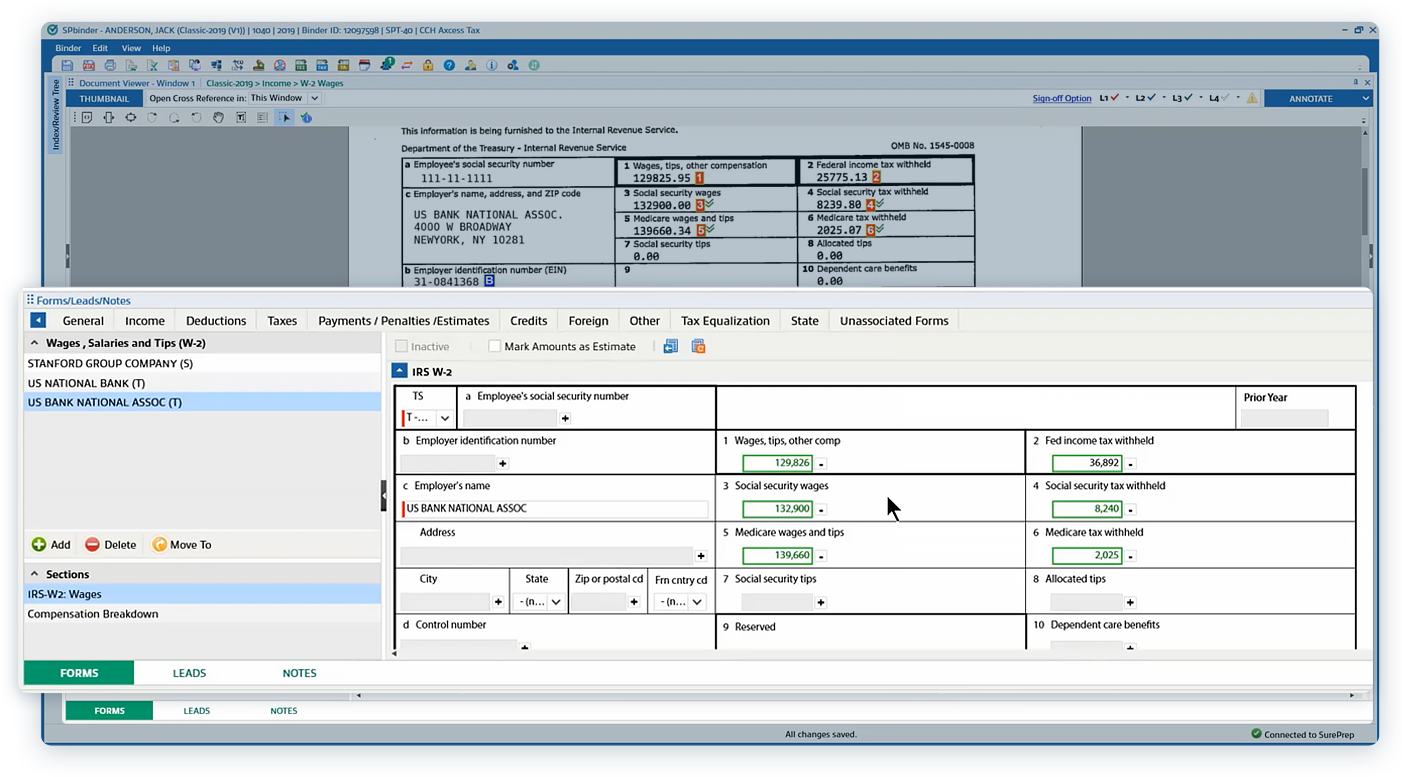
Forms allow users to review, edit, and add data from source documents. Every Form is connected to a workpaper and the fields on the Form correspond to the fields on the workpaper. The data you see in Forms is the data that will export to your tax software.
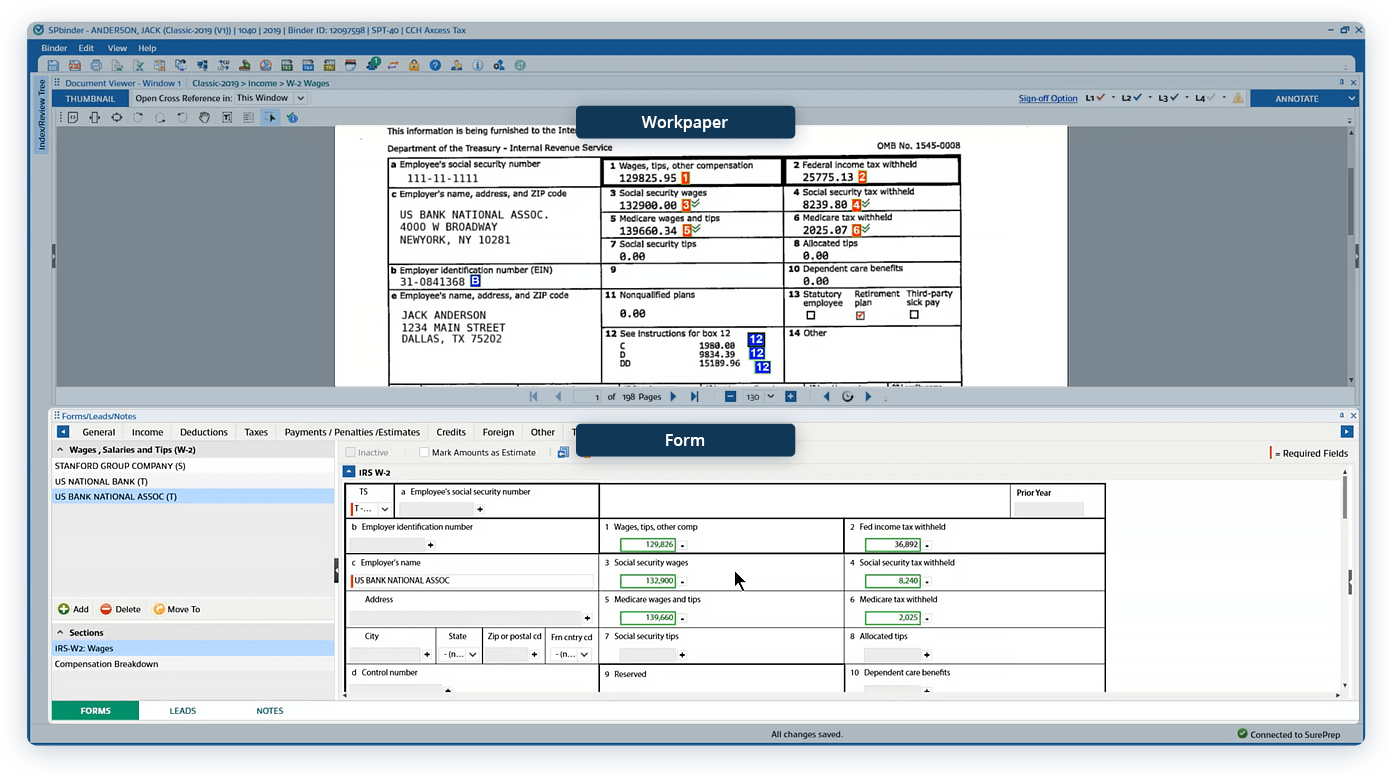
1040SCAN’s OCR auto-populates Form fields for standard documents. SPbinder provides easy tools like click-and-drag OCR to manually populate Form fields for non-standard documents
Data from the Forms tab populates SPbinder’s Leadsheets, and Leadsheets link back to Forms. If users choose not to use Classic Leadsheets, the Forms tab will not be present. In these cases, users would review, edit, and add data directly in their tax software. Read more about Leadsheets→
Forms Tab Navigation
Across the top of the Forms tab, you will see Category tabs that mirror the categories in your tax software. (E.g., GoSystem RS users will see categories like Income, Gains and Losses, Taxes, etc.)
Within each Category is a list of Sub-Sections. (E.g., The Income Category might contain Wages and Salaries, 1099s, and Brokerage Statements.)
Within each Sub-Section is a list of Input Forms. The Input Forms correspond directly to the workpapers themselves. (E.g., The Wages and Salaries Sub-Section might contain a W-2.)
In our examples above, the navigation path to a W-2 would be: Income > Wages and Salaries > Input Forms > W-2
However, most of the time, users will arrive at a Form by clicking on a link elsewhere in the binder. Clicking directly on a workpaper field in the Document Viewer will launch the corresponding Input Form and highlight the selected field. Users may also arrive at a Form through Review Tree items or Leadsheets reference links.
Leads
The Leads tab houses SPbinder’s digital Leadsheets. Read more about Leadsheets→
Notes
The Notes tab houses SPbinder’s collaborative Notes functionality. Read more about Notes→
K-1 Reclass
Users can choose to add the K-1 Reclass tab to take advantage of SPbinder’s new K-1 reclassification tools. Read more about K-1 Reclass→
By default, the Forms/Leads/Notes module is displayed at the bottom of the workspace.